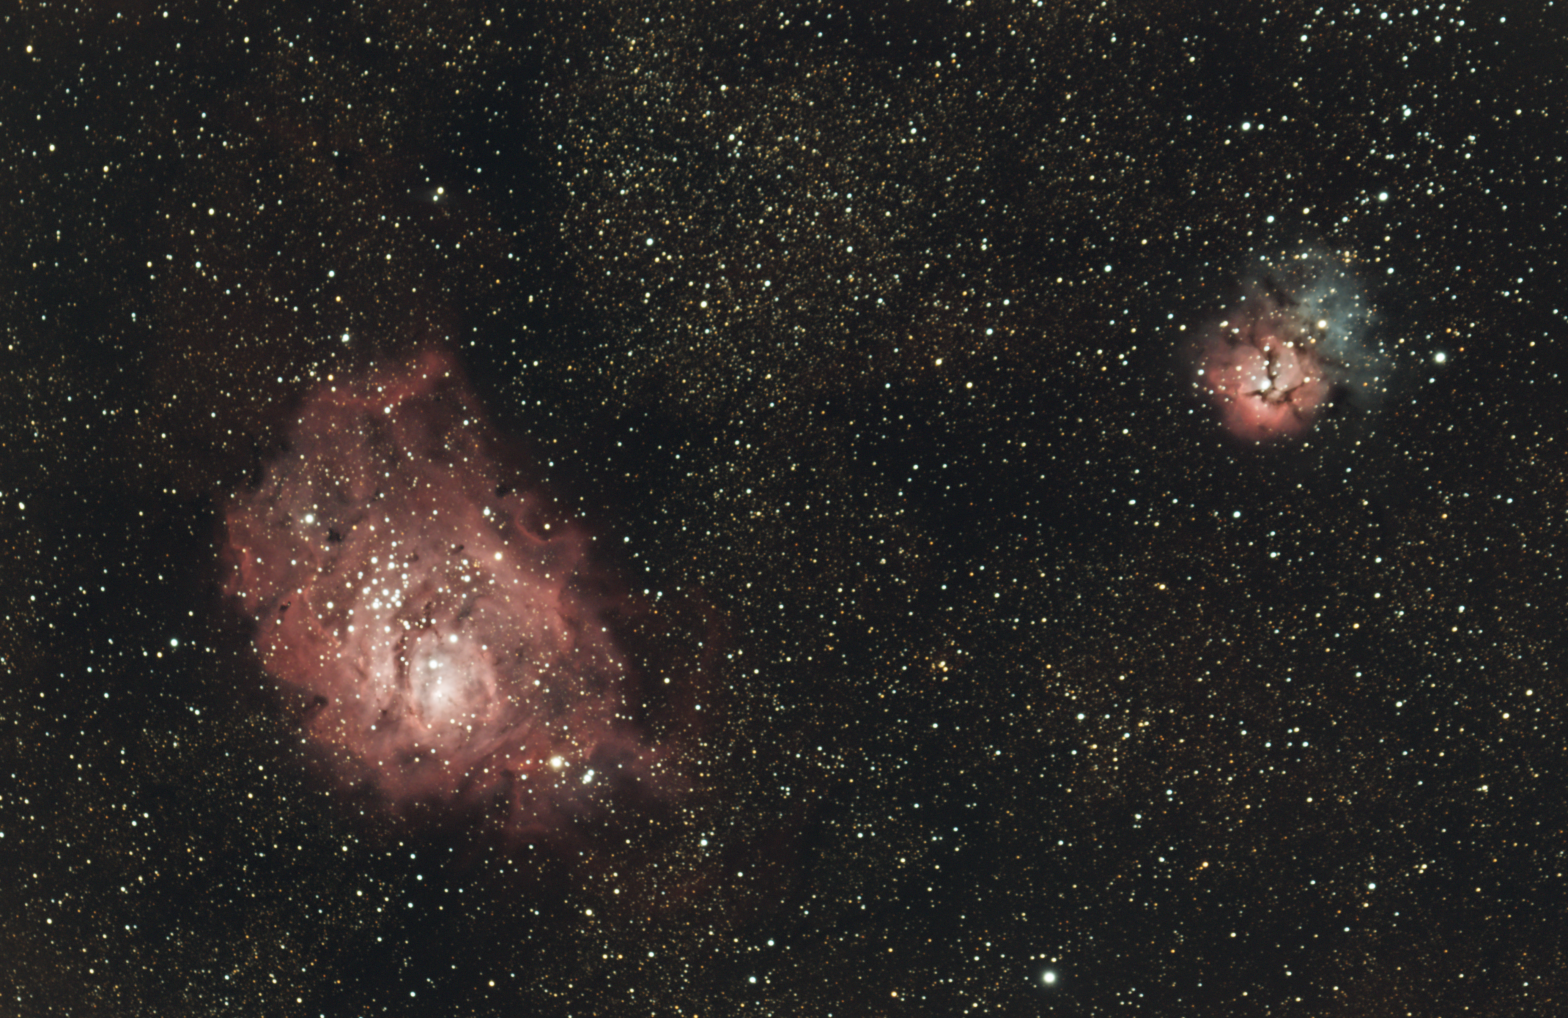
Right in the heart of the Milky Way lie a few popular nebulae. The Lagoon and Trifid Nebulae are so close together, that even at 510mm they fit into a crop sensor field of view. This was a quick and dirty imaging session. Guiding was horrible (up to 3.5 arcsec) and I had very little time to shoot them, due to their low location in the sky. But at least I coughed something up.
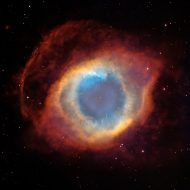
Lagoon and Trifid Nebulae (M20,M8)
GEAR USED
Orion ED80 with 0.85x reducer AVX mount D5300 Halpha modded ST80/QHY5L-II-M guiding
Not very happy with the guiding during this session. The weight of the C6N along with the overweight guidescope (ST80) presented a lot of issues getting good RMS. In addition, my reflector’s focus and/or collimation was a hair off. But it is what it is 🙂
GEAR USED
Celestron 6″ Newtonian AVX Mount H-alpha modified D5300 ST80/QHY5L-II-M
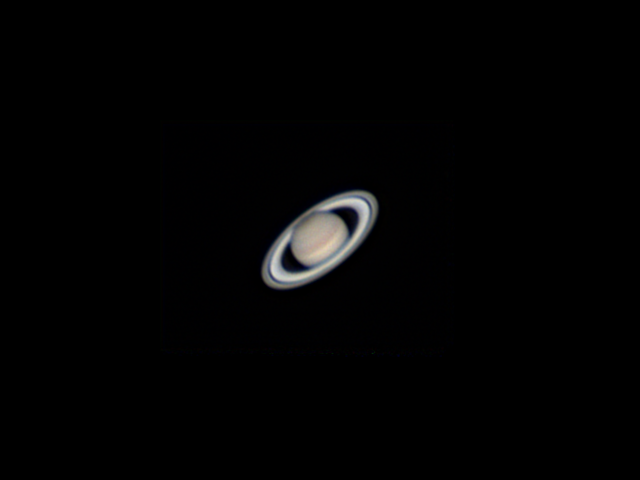
After imaging Jupiter, my next planet in the list is obviously Saturn. The only planet in the solar system with a prominent ring system, this one needs no introduction. My first tries imaging this with the low quality 80mm chromatic telescope produced a very tiny and yellow dusty colored oval patch. I did not have enough focal length to really get to the details. But now I have the Televue 3x Barlow for the magnification, and with proper color balancing in SharpCap, I should get much better results. After waiting for a clear night with descent seeing, I tried my luck. Here is the my image of Saturn:
Saturn using Celestron 6″ Newtonian and QHY224c
I shot 10,000 frames using SharpCap, stacked using Autostakkert 2500 best frames, used Registax for wavelet processing and Photoshop for saturation and canvas increase.
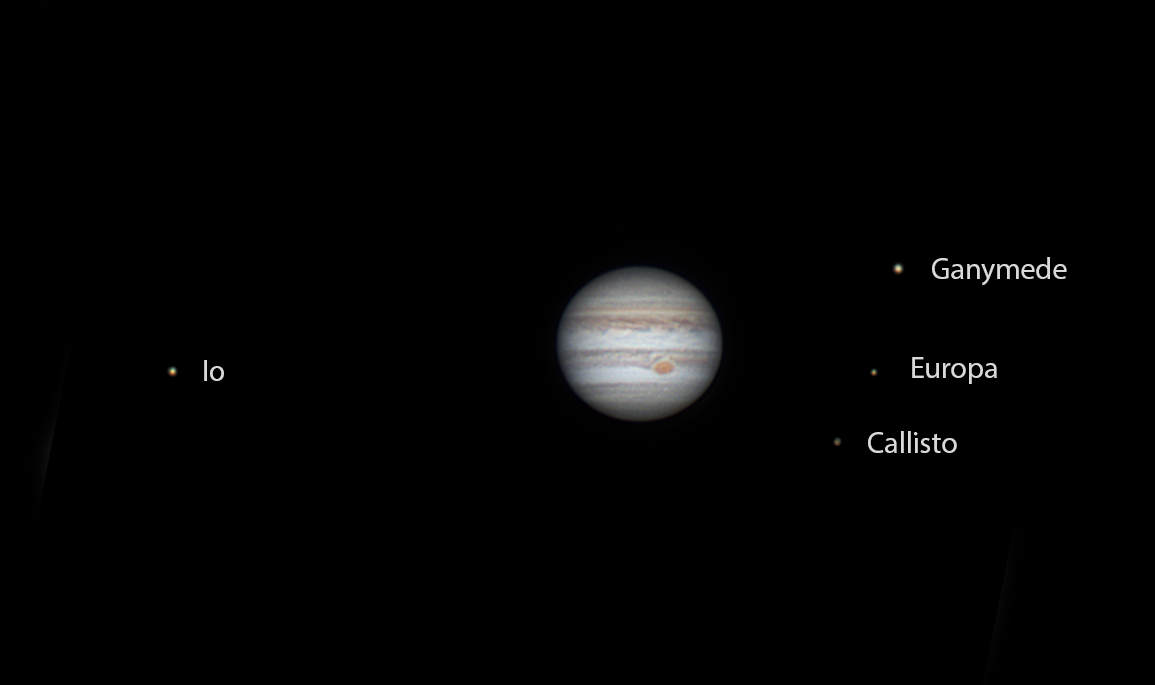
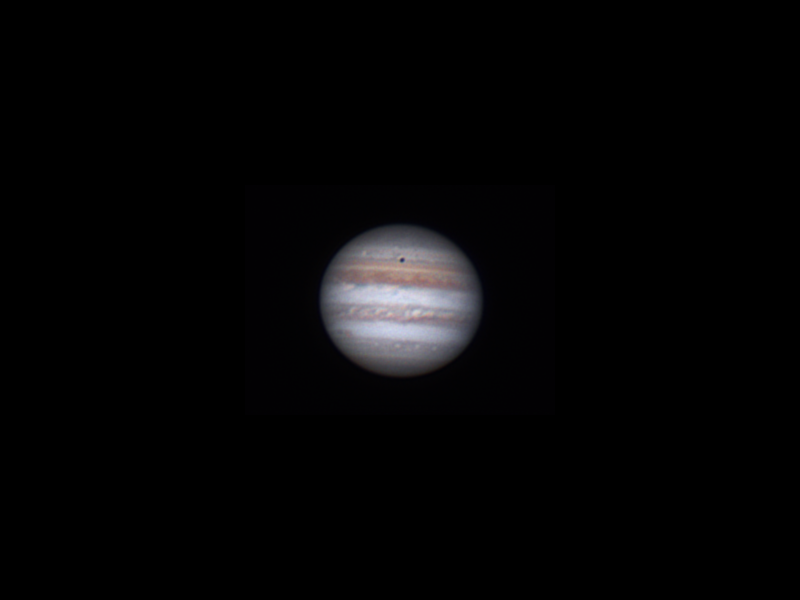
By using Mobile Observatory app for Android, I found the optimal day to shoot Jupiter. The planet not only had to reveal the red spot, but it had to do so while being as high up in the sky as possible. Living in Toronto results in planets being lower in the sky. Planets that are closer to the horizon are behind more atmosphere, resulting in more turbulent, blurry images. Finally, I waited for good seeing and transparency conditions as indicated on the cleardarksky.com website.
Hover over image to see moon labels
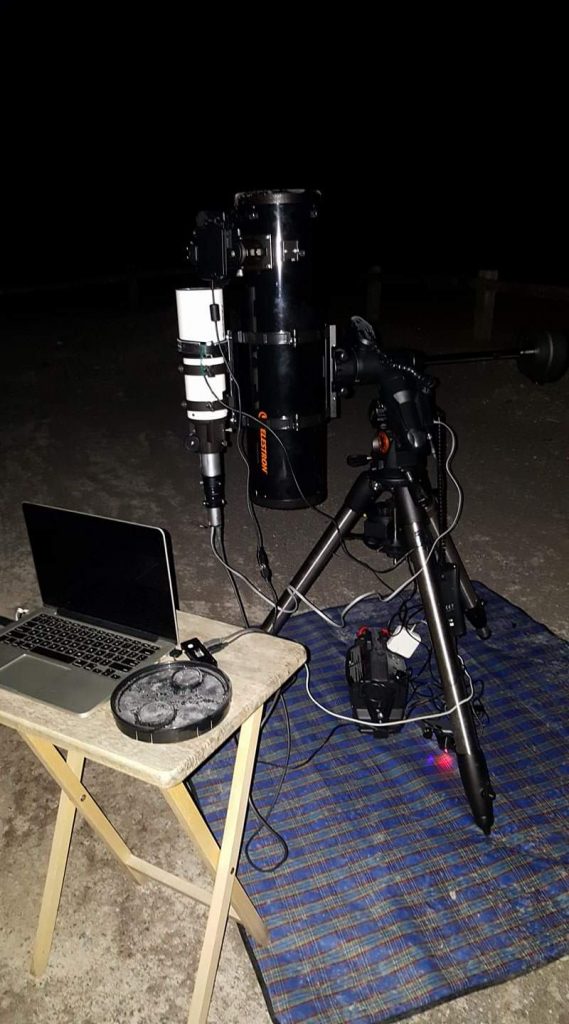
Celeston C6N & AVX
QHYIII-224C
Televue 3x shot at around f20
The secret in getting detailed images of planets is a planetary camera. The problem with a DSLR as you probably know is getting a high frame rate. Also, the pixel size is usually slightly larger.
If you get a USB 3.0 camera, you can get very fast frame rates. Since you never shoot at full resolution (a planet usually never occupies more than 320×240 pixels), you get to increase the frame rate. Frame rate is directly related to your exposure setting. So if you keep your exposure at 5-10ms, you get between 100-200 frames per second. The trick is to lower the exposure as low as possible, and then increase the gain to reach a 75% histogram. Shooting using these planetary cameras is extremely easy, they are compatible with some very great software. Also, they double up as guide cams.
I shot this image at 140fps. But the camera can shoot much faster. I took about 6000 frames in 42 seconds. That way, I get very little rotation in the image. Finally, I only pick about 15% of the images, the best of the very best. And then I stack those. That way I get the clearest possible image, and at 15%, I’m still stacking 900 frames.
QHY224C is an amazing camera. The most popular one is ZWO’s ASI224, but not a lot of people know that the QHY224C has the same SONY sensor. The difference is that you also get a passive cooling design, and anti-amp glow, which is important for longer exposure shots.
For focus, there are many methods to focus. You can use a Bahtinov mask. I personally just focus on a star. Right now, Spica is close by, and so I slew to Spica, and using FWHM, I get the star as small as possible. It is very tricky, because the C6N focuser is really coarse, but at least it holds the focus well (since the focuser is stiff).
This is my first color image of Jupiter using my new QHY5-III-224c camera. Taken with a Celestron C6N, AVX Mount, and a Televue 3x barlow.
The seeing was average. I took 4000 frames at 10ms/17gain and picked the best 15 percent to stack in Registax. Finally I performed wavelet sharpening and final touches in Photoshop.
Shooting all night in remote woods at -15C is brutal. The biggest challenge is frozen fingers and feet. The only refuge was my car, where I took shelter during small breaks. Yet I managed to complete this imaging session and have a beautiful image to share.
M51 – Whirlpool Galaxy
The Whirlpool Galaxy is one of my favorites, because of the beautiful interaction it has with its companion galaxy NGC5994. Below is the shot of my gear, while imaging in a lone, dark and cold park parking lot.
Frost on cap and -15C imaging session
GEAR USED
Celestron 6″ Newtonian AVX Mount H-alpha modified D5300 ST80/QHY5L-II-M
IMAGE ACQUISITION DETAILS
21 subs x 180s seconds (dithered) 31 Bias Flats – too cold to do them PHD guiding, BackyardNikon Sharpcap polar alignment DSS, Pixinsight
After taking the first few planetary images using the mono QHY5L-II camera, I quickly started thinking about the best way for me to acquire images in colour.
I had two choices – either get a filter wheel with RGB filters to use with my existing mono camera, or purchase a colour camera instead. Although advanced imagers often use mono cameras with filters, it is a bit more work and hassle. You need to switch filters tree times to get an RGB image, all while making sure the focus is dead on between each filter change. With a colour camera, this process is really simplified. With a single high speed video, your imaging session is complete. I heard rave reviews about the IMX224 sensor, and decided to purchase the QHYCCD version of the popular camera.
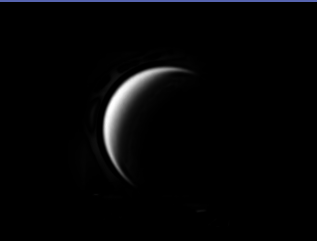
Just a very quick shot of Venus. From setup to disassembly took 40 min. Just shows you how much easier and less time consuming planetary imaging is.
Venus using ED80
ED80, AVX, QHY5L-II-M and 3x Televue Barlow
After stacking in Registax and applying wavelet processing, a fellow redditor used PixInsight to sharpen the image by doing a deconvolution (1.20 STDev and 0.60 Shape) and then applying GreyCStoriation to denoise it.
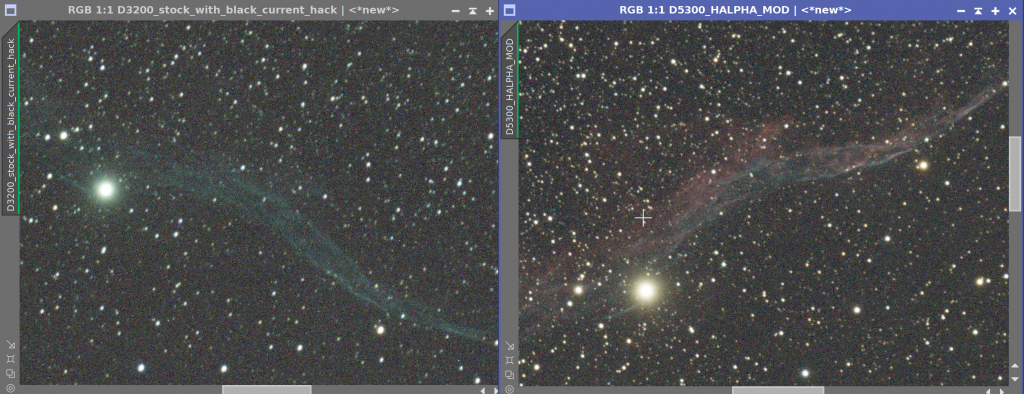
If anyone ever wanted to see how much of a difference a modded DSLR makes, these comparisons do a great job demonstrating that. Both images were done in the same location, using same gear and exposure length.
The first example is the Veil nebula. It has equally strong Ha and Oiii signal. Ha comes out dark red and Oiii is a teal color. From the image, it is seen that both cameras pick up Oiii equally well, but only the modded camera picks up the Ha.
Veil nebula with D3200 vs Ha modded D5300
The other main difference is that the stars are clearly more bloated on the modded D5300, due to the increased signal sensitivity of h-alpha.
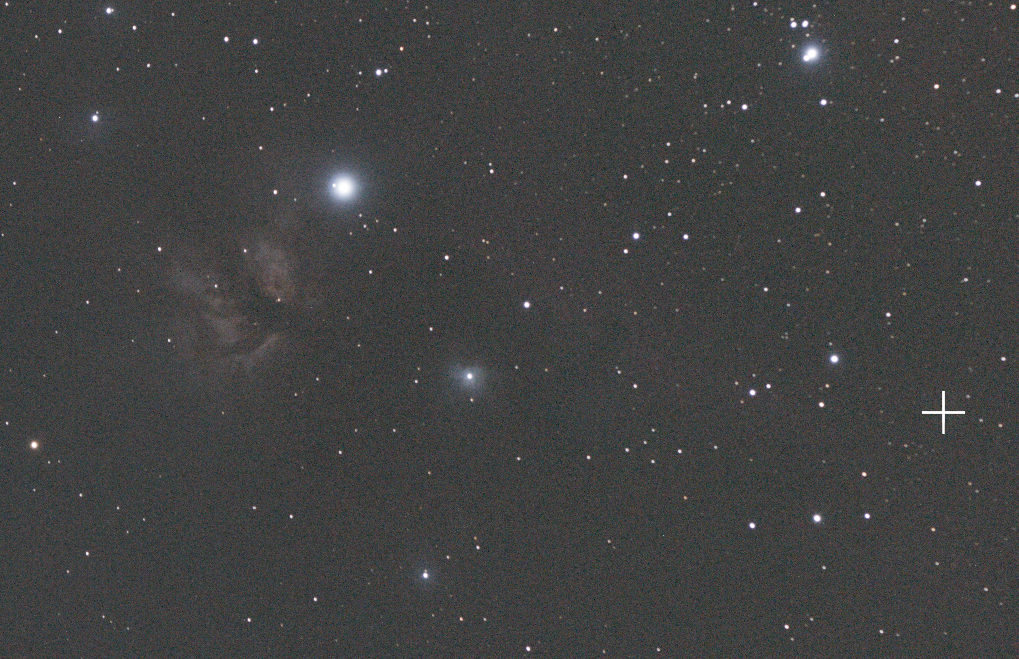
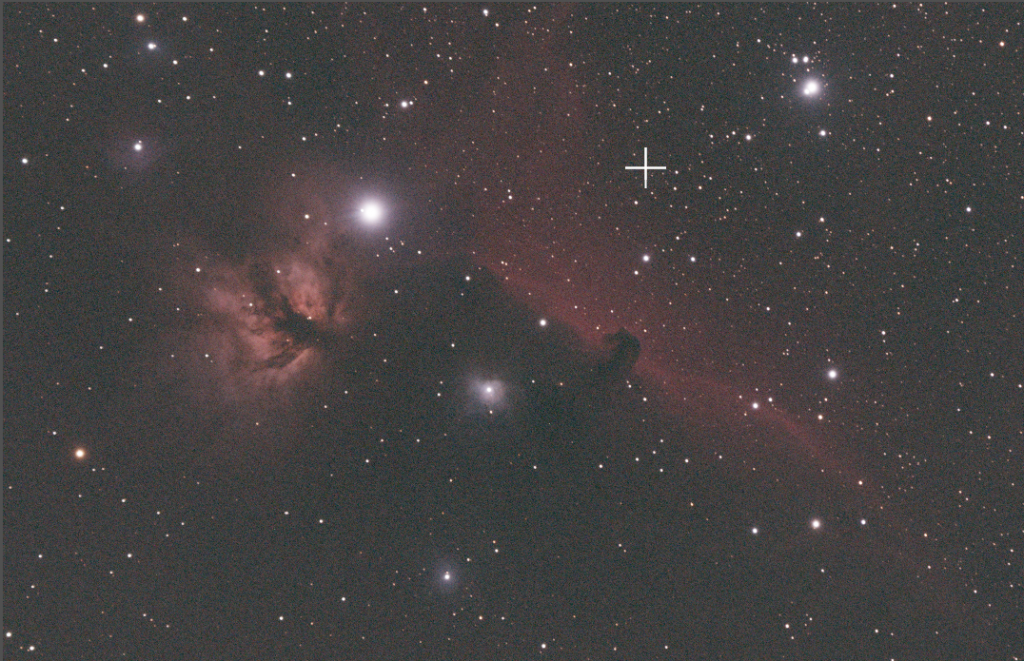
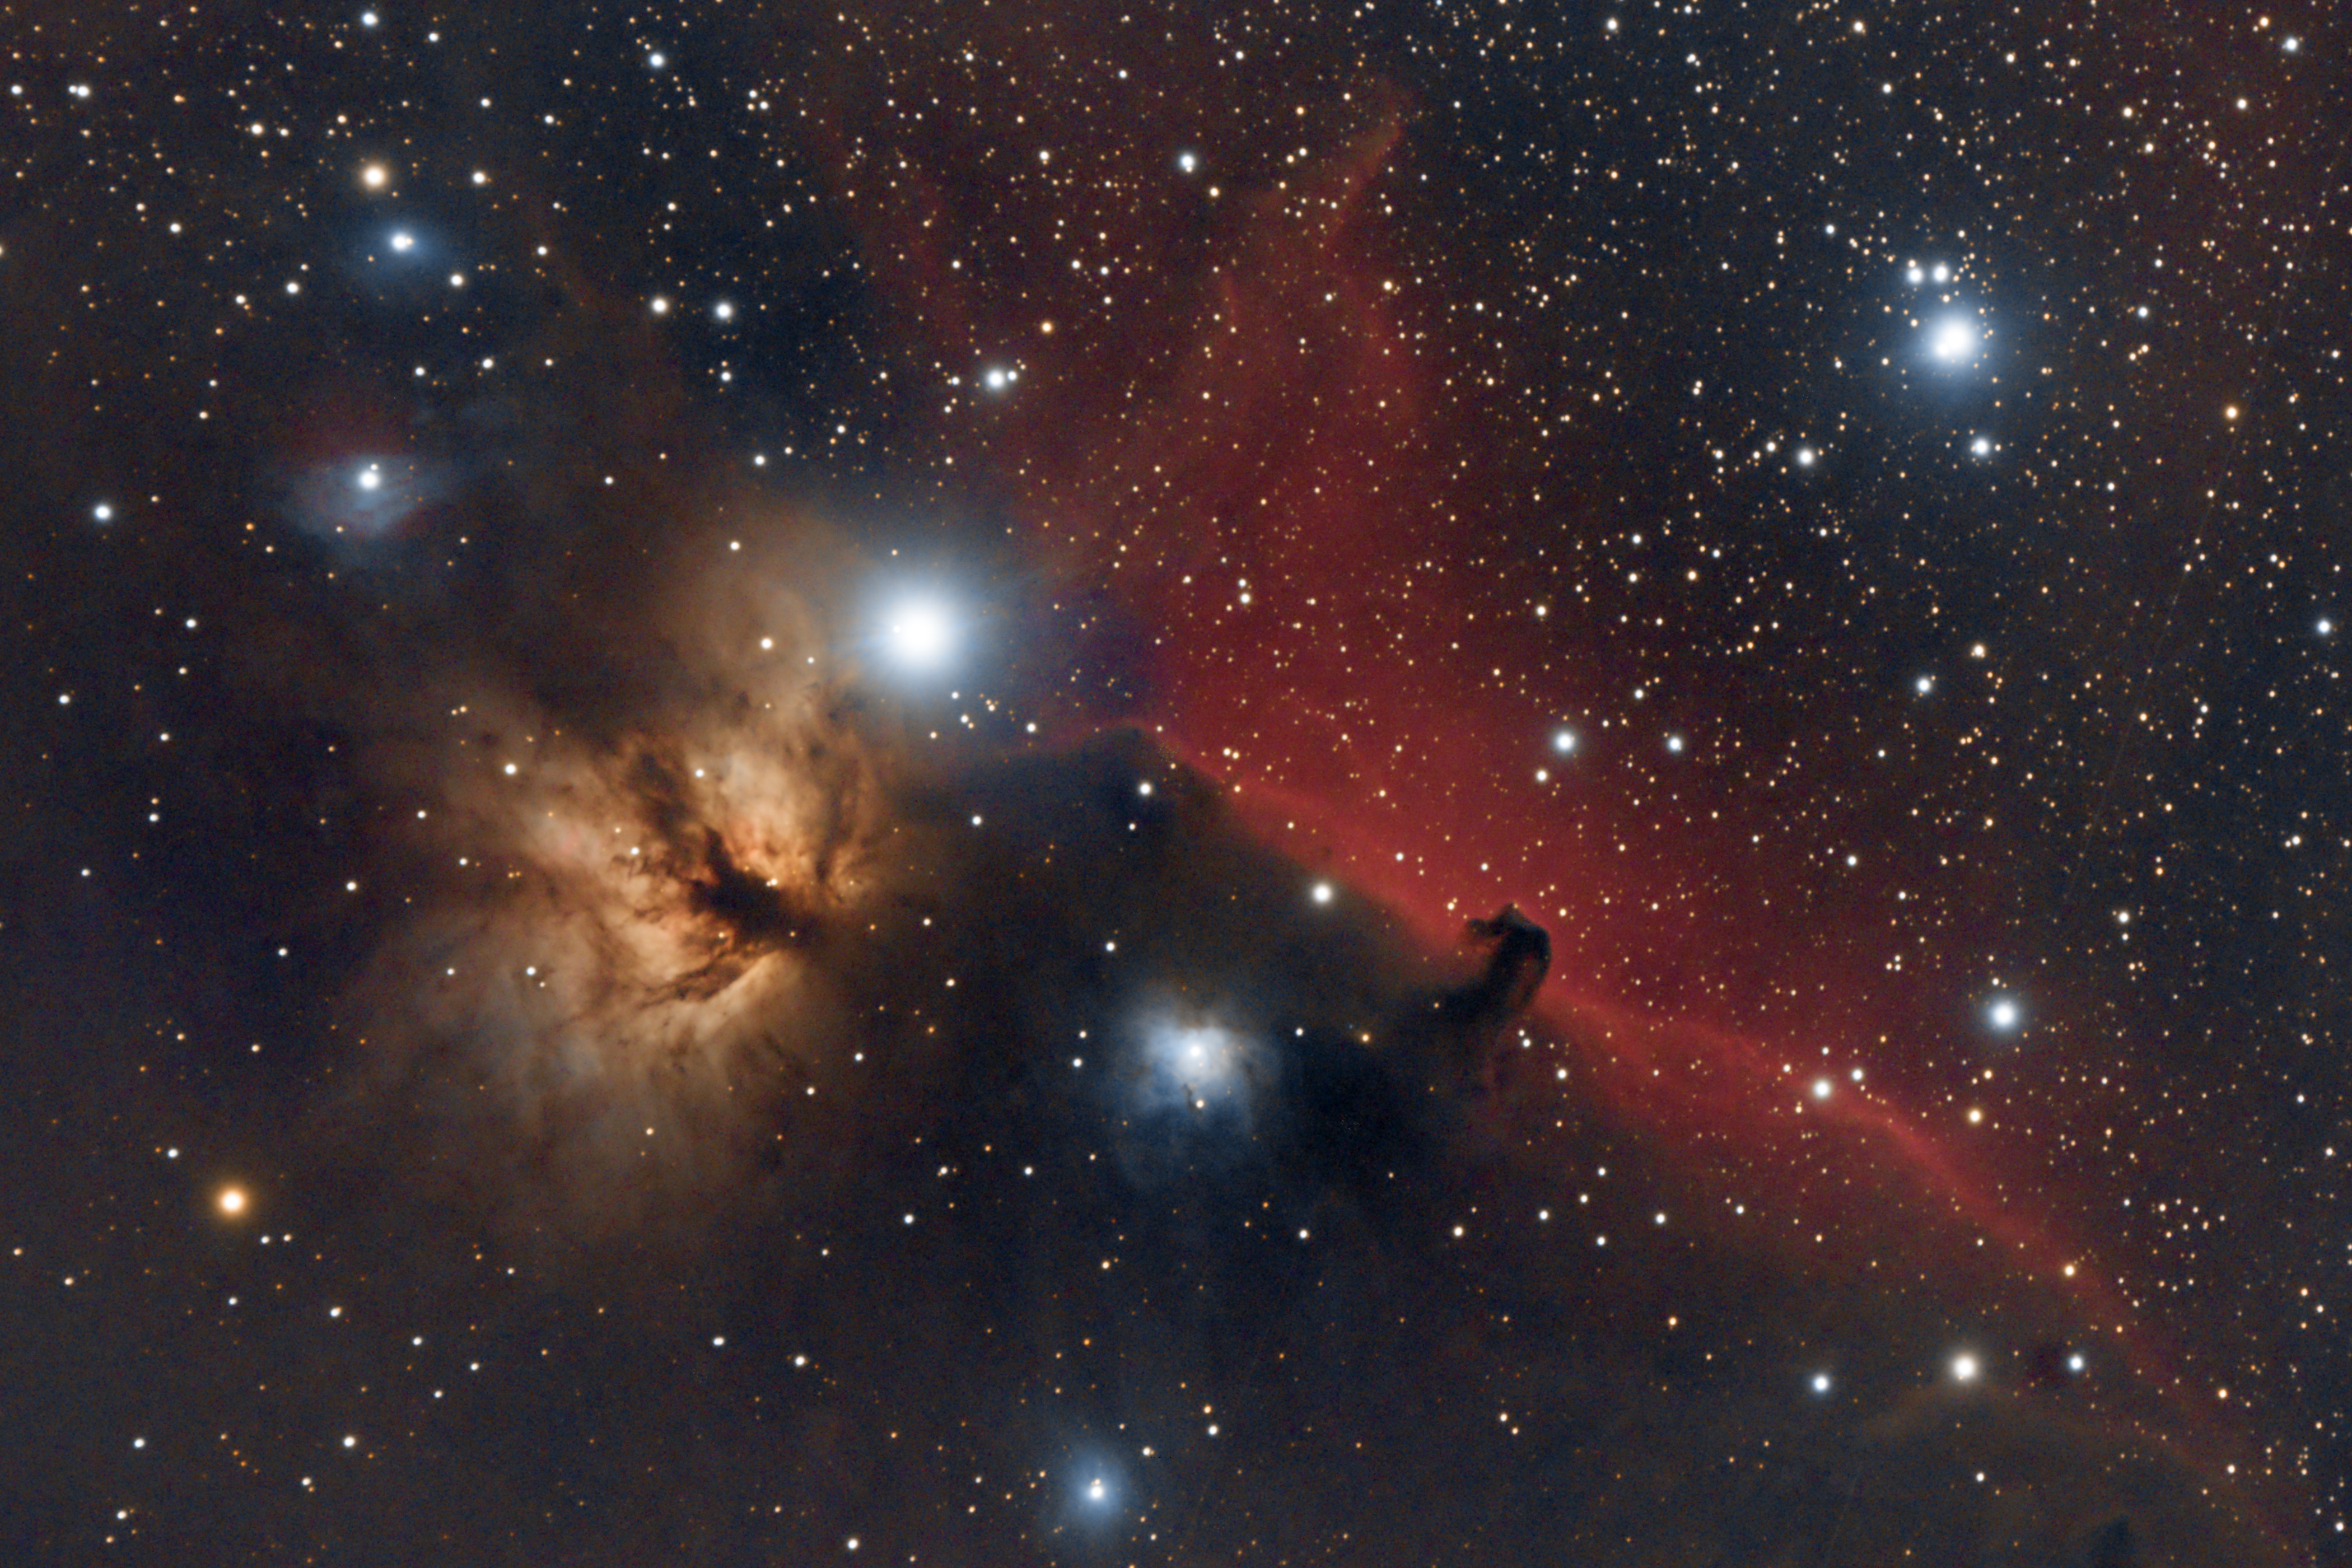
Second comparison shows the Horsehead nebula. It is a strong Ha emission type nebula and as you can see, barely registers on the D3200.
Single frame from D3200Single frame from D5300 h-alpha modded by LifePixel
Another cold winter session and I’m trying out my new LifePixel modified Nikon D5300. The h-alpha response is incredible. I can finally see strong dark red signal registering. This is a great improvement over my D3200 camera. In addition, I have stopped using dark frames. It is too time consuming and a pain to accurately match them to the sensor temperature during imaging. Dithering is much more effective and produces much better results on DSLRs. By hooking up the camera to BackyardNikon, I can setup a dithering routine with a click of a button.